

Ever wonder how a simple spark can turn plain metal into a strong join? MIG welding makes it easy to create clean bonds. It might seem tricky at first, but this method uses a steady wire and a flow of protective gas to hold everything together. This guide breaks the process into clear, simple steps. Get ready to tap into the spark and see how you can create lasting metal work.
MIG Welding for Beginners: Embrace the Spark

MIG welding means using a special method to join metals. It stands for Metal Inert Gas welding and is also called Gas Metal Arc Welding (GMAW). This technique was developed after World War II. It works by feeding a wire electrode nonstop while a protective gas shields the weld from the air. This design is great for working with steel, stainless steel, and mild steel. Picture a clean weld with little slag or extra spatter, that is the promise of MIG welding.
Learning MIG welding is straightforward. A MIG welder has two main controls: voltage and wire-feed speed. You set the voltage to give the right power for your weld and adjust the wire-feed speed to control how fast the wire comes out. Think of it like setting the oven temperature and making sure the dough rises at the right pace. For example, for a 0.023-inch wire, start with about 40 to 145 A, a 0.035-inch wire may need 50 to 180 A, and a 0.045-inch wire usually runs at roughly 75 to 250 A. Using the correct polarity is important to keep spatter low and ensure the weld goes deep enough.
MIG welding is known for being clean and efficient. Since it creates very little spatter, cleanup takes less time. For beginners, its simple setup and forgiving nature help build confidence as you learn and improve your welding skills.
Essential MIG Equipment and Setup for Beginners

Start by gathering the basic tools for your first MIG welding station. You will need a MIG welder that lets you adjust from 30 to 200 A. This machine is the heart of your station. It has two simple adjustments: voltage and wire-feed speed. Each setting you tweak can change how your weld joins together.
Next, pick up some shielding-gas cylinders. You can choose sizes like 40, 80, or 125 cubic feet. The gas inside protects your weld by keeping unwanted particles away, a bit like an invisible shield.
You will also need continuous welding wire that suits your project. Match it with a strong torch assembly that has the right hoses and cables. Make sure the hose fittings are tight to avoid leaks, and check that you have a good ground connection.
Don't forget safety and preparation tools. Essential items include an auto-darkening helmet to protect your eyes, a stainless-steel wire brush for cleaning metal, and C- or G-clamps to hold parts in place. An angle grinder can help you clean surfaces or smooth the weld beads.
Follow these easy steps to set up your MIG welding station:
- Put your MIG welder on a sturdy surface.
- Connect the shielding gas cylinder and test for leaks.
- Load the continuous welding wire and secure the torch assembly.
- Check that the ground connection is firm.
- Arrange all your safety and prep tools nearby.
With these steps, you now have a beginner-friendly setup. Enjoy focusing on your welding work with confidence in your organized station.
Welding Safety Basics and Protective Gear Guidelines

Welding safely is very important for beginners. Make sure you have all the right gear on before you start. Use an auto-darkening helmet or safety goggles to protect your eyes from strong UV light and sparks. Wear long sleeves made from flame-resistant material, sturdy leather gloves, and tough leather boots. If you are welding in a place with little fresh air, add a respirator or fume mask. Keep a fire extinguisher nearby so you can quickly put out any unexpected flames.
Before you begin welding, complete a pre-weld inspection checklist to protect yourself:
- Check cables, hoses, and the ground clamp for any wear or damage.
- Make sure gas cylinders are stored upright and the regulator settings are correct.
- Confirm your work area has good ventilation to lower inhalation risks.
Welding can expose you to hazards such as UV radiation, molten spatter, and risks from handling compressed gases. Take your time to inspect each piece of equipment before you start. For example, give your helmet a good look-over, just as a pro would, so you never compromise on safety. By following these steps, you lower the risk of burns, sparks, and breathing in harmful fumes while keeping your welding process safe and efficient.
Mastering Basic MIG Welding Techniques
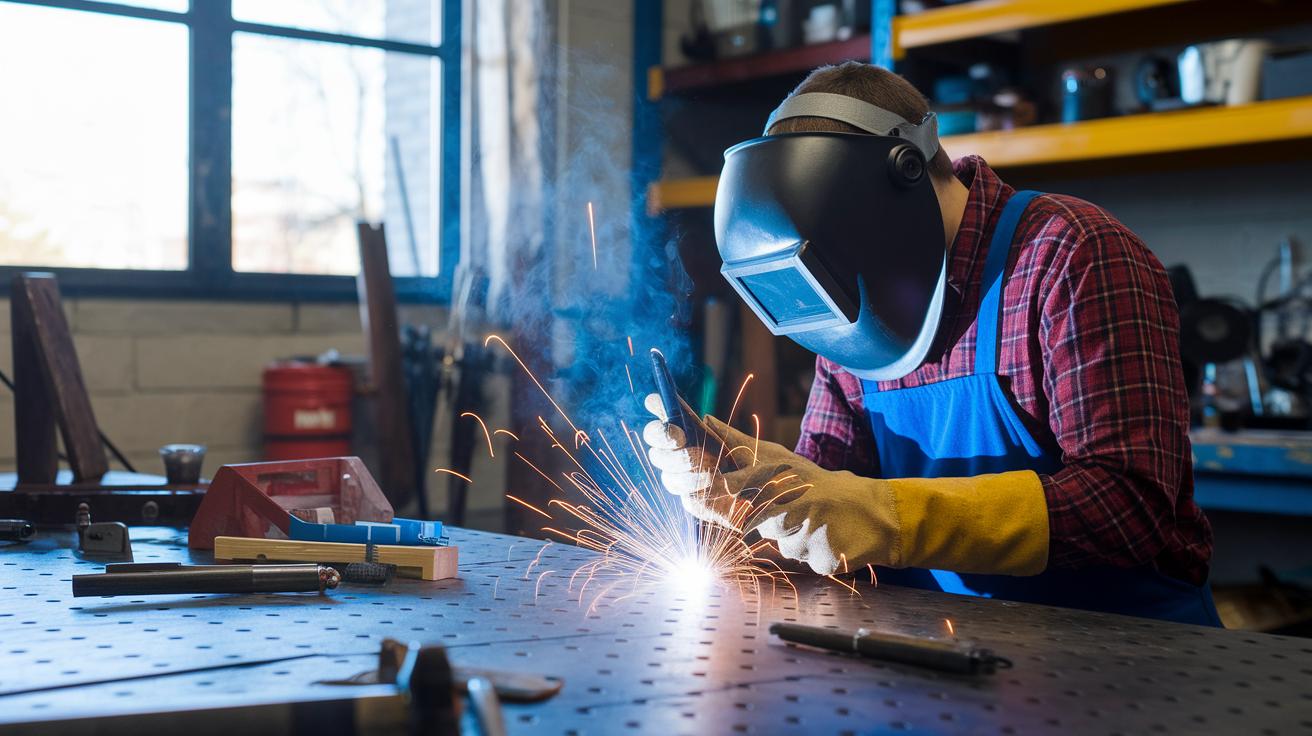
Project Snapshot • 2–4 hours • $100–$300 (materials only, prices vary) • Beginner to Intermediate • Tools: MIG welder, cleaning supplies, protective gear • Safety: Always wear your welding helmet and gloves
MIG welding uses a steadily fed wire electrode that creates an arc to melt both the base metal and the filler. This melting produces a smooth bead. Follow clear, step-by-step instructions to get even welds and boost your torch skills.
First, prepare your metal and set up your machine. Clean the metal well by removing rust, oil, or paint. Next, adjust your welder by setting the voltage and wire-feed speed to suit your project. Secure the ground clamp tightly for a solid connection. Then, set your shielding gas flow between 20 and 30 CFH. The gas protects the hot weld pool from air, keeping it clean.
Now, practice with a few test arcs. This helps you see how your settings affect the weld puddle and bead shape. If the puddle is too big, try lowering the voltage a little for better control.
When you start welding, use either a push or pull motion with a 10- to 15-degree torch tilt. Pushing (pointing the torch away from the weld) makes the bead broader and flatter, while pulling (bringing the torch toward you) gives a bit more penetration. Move your torch at a steady rate so the molten metal flows uniformly. Think of it like using a paintbrush at a slight angle to lay down a smooth stroke.
Keep the wire sticking out about 3/8" to 1/2". This distance gives you the best control over the arc and bead formation.
Steps to follow:
- Clean metal surfaces.
- Adjust machine settings.
- Secure the ground clamp.
- Set gas flow to 20–30 CFH.
- Practice with test arcs.
- Tweak voltage and feed speed as needed.
- Keep a 3/8"–1/2" wire stick-out.
Practice these steps until you see a stable arc and create even beads. Take your time with each change and soon you'll feel more confident handling your torch and perfecting your welds.
Dialing in Settings: Voltage, Feed Speed, and Shielding Gases

Begin with your machine's midrange factory settings. Then, slowly adjust the voltage and feed speed by 1 or 2 notches. Keep an eye on your weld bead during each change. If the arc starts to flicker, lower the voltage a little until the weld puddle becomes smooth.
Next, choose the right shielding gas based on the metal you are welding. For aluminum and other nonferrous metals, use pure argon. For carbon steel, a mix of 75% argon and 25% CO2 works best. Also, set the gas flow to about 20–30 CFH (cubic feet per hour) to keep your weld protected.
Steps:
- Set your machine to midrange factory settings.
- Adjust voltage and feed speed by 1–2 notches and check the weld bead.
- Make sure the shielding gas suits your metal type.
- Keep the gas flow steady at 20–30 CFH.
Beginner Joint Strategies and Welding Positions

MIG welding offers many joint types and positions, and beginners need to learn how each works. A butt joint is when two sheets meet edge-to-edge. Make sure they fit tightly, and if the metal is thick, use a backing strip to support the weld. Lap joints have panels that overlap, so proper alignment is a must. T-joints form a right-angle connection. For thicker pieces, a backing strip helps the weld get good penetration.
Practice these four basic welding positions to improve your skills:
- Flat Position – Here the workpiece lies secure and steady. This lets you concentrate on controlling your bead.
- Horizontal Position – Use a slight weaving motion like a gentle, curved stroke to keep an even bead.
- Vertical-Up Position – Keep a short arc and move upward steadily. Start each stitch with a quick burst of energy, then work upward.
- Overhead Position – Slow down your wire speed and use quick stitch passes to prevent sagging and drips.
Keep your travel angle and speed consistent to get a uniform bead on every joint. For example, when working on a T-joint, maintain a steady torch angle so the metals fuse completely. Following these preparation steps will build a strong foundation for your welding skills and boost your confidence on the job.
Troubleshooting Common MIG Welding Issues

If your weld has too much spatter or uneven beads, start by checking your polarity and gas flow. Incorrect polarity or weak gas flow can cause extra spatter and weak spots in the weld. For example, if your shield gas flows at less than 20-30 CFH, it may not protect the weld well, letting in contaminants.
Next, look at the drive rolls. If you notice the wire twisting in a bird-nesting pattern, your wire tension or liner might be off. Try adjusting the tension or replacing the roller. An uneven travel speed can also cause a bumpy bead and puddle, so keep your pace steady.
Follow these steps to fix common welding problems:
- Make sure the ground clamp is secure.
- Check the cylinder pressure and set the regulator correctly.
- Clean the nozzle if you see dirt or spatter buildup. Routine cleaning works best.
- Ensure the machine settings, like voltage and wire-feed speed, suit the metal's thickness.
- Remove any surface dirt or contaminants.
Taking care of these details can boost your weld quality. Fixing these issues early helps build your confidence as you continue welding.
Practice Projects and Budget-Friendly Machine Options

Begin your welding journey with small scrap-steel projects. Try practicing butt welds on panels, lap joints on strips, and T joints on angle-iron brackets. For instance, you might reuse metal from an old filing cabinet to test a butt weld. I started with scrap metal to create a makeshift toolbox repair panel and it really boosted my confidence.
Many welding tasks around the home are simple and useful. You can fix a broken toolbox, make shelf brackets, or strengthen fence posts. These projects help you build your skills while improving your home at the same time.
When planning your welding setup, remember to include the cost of the machine, consumables, shielding gas, and safety gear. Typically, entry-level MIG welders cost between $300 and $600 for beginners. If you choose a gas-core (flux-cored) model, expect prices to start around $200. More precise gas-shielded units might cost between $500 and $900.
Here are the key points to remember:
- Scrap-steel projects are great for building weld confidence.
- Home projects like toolbox repairs, shelf brackets, and fence-post improvements are practical and skill-building.
- Set a budget that covers the machine, consumables, gas, and protective gear.
These budget-friendly projects let you learn welding in small, fun sessions without breaking the bank. Enjoy each project as a step forward in your welding journey and watch your skills grow with every bead you lay.
Maintenance and Resources for Novice MIG Welders

Keep your equipment running smoothly by cleaning your contact tips and nozzles after every use or replacing them when needed. Check liners, cables, and drive rolls for signs of wear. Lubricate your torch O-rings to keep movements smooth and extend your torch's life.
Tidy up your workshop with bins or containers for wire spools, clamps, and spare parts. An organized space helps you find your tools quickly and boosts your efficiency as you build your welding skills.
Follow the manufacturer's schedule for routine upkeep. These instructions are set to keep your machine at its best and help avoid surprise breakdowns.
For more tips and handy techniques, explore online tutorials, structured courses, and welding forums. Many experienced welders share step-by-step advice and troubleshooting tips on these platforms.
Steps to follow:
- Clean your contact tips and nozzles.
- Inspect liners, cables, and drive rolls.
- Organize your tools and extra parts.
- Use online resources and community channels to learn more.
Final Words
In the action, we covered the basics of MIG welding, from understanding the fundamentals and setting up essential equipment to mastering safety practices and welding techniques. We walked through adjusting machine settings, tackling common issues, and planning budget-friendly practice projects.
This guide for mig welding for beginners offers clear steps and ongoing maintenance tips that build lasting skills. Keep testing your technique, stay safe, and remember that every weld brings you a step closer to professional-looking results.
FAQ
Frequently Asked Questions
What does MIG welding offer for beginners?
The MIG welding process offers beginners a simple, clean method by continuously feeding a wire that melts into a slag-free bead on steel and stainless materials, making it ideal for learning the basics.
Can I teach myself MIG welding, and is it easy for beginners?
Self-teaching MIG welding is possible with practice and quality resources. Its user-friendly controls and clear process make it approachable, though dedication is needed to build proper skills.
What are the essential basics of a MIG welding machine and setup?
A MIG welding machine features adjustable controls for voltage and wire feed speed, along with a necessary setup that includes a proper ground connection, shielding gas, and compatible consumables for efficient, clean welds.
How does the push or pull technique affect MIG welding?
The push or pull method affects bead shape and penetration. Typically, maintaining a slight push at a 10°–15° angle helps control puddle size, while technique adjustments impact weld stability and quality.
Which wire is better for MIG welding: .030 or .035?
The choice between .030 and .035 wires depends on your project. Thicker wires offer more heat input and penetration, while thinner wires suit lighter tasks. Your machine’s settings and the metal type will guide the best option.
What resources can assist beginners in learning MIG welding?
Beginners can benefit from YouTube tutorials, PDF guides, and technique tips, which provide visual and written instructions on safety, machine setup, and step-by-step welding practices for improved skill.
What is gasless MIG welding?
Gasless MIG welding uses flux-cored wire instead of external shielding gas. It is ideal for outdoor work where wind disrupts gas flow, though it tends to produce more spatter than gas-shielded methods.
How does MIG welding differ from other welding methods like arc or resistance welding?
MIG welding uses a continuously fed wire and inert gas for clean joints, unlike arc welding that may create slag, or resistance welding which uses electric pressure. Each method has unique benefits depending on the project.